1. Install the program
Click the Download button to download the installer program and install the program.
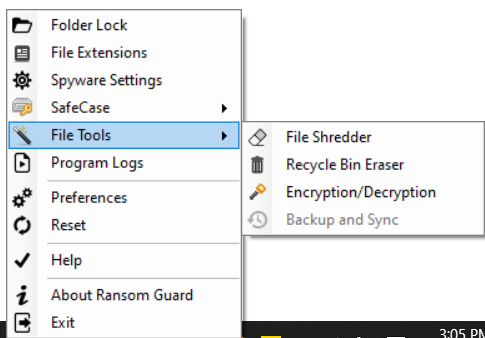
When the installation is complete, an orange-shaped tray icon will appear in the lower right corner, and click the icon to bring up a menu.
![]()
2. Basic function
During Ransom Guard operation, when files with registered file extensions are modified, the process of modifying the file is checked.
If it is an unknown process during the process, a warning window will be displayed to the user.
As shown below, by default, Windows Defender antivirus is used to scan for viruses, and
if there is information about the process on the server, the user is notified.
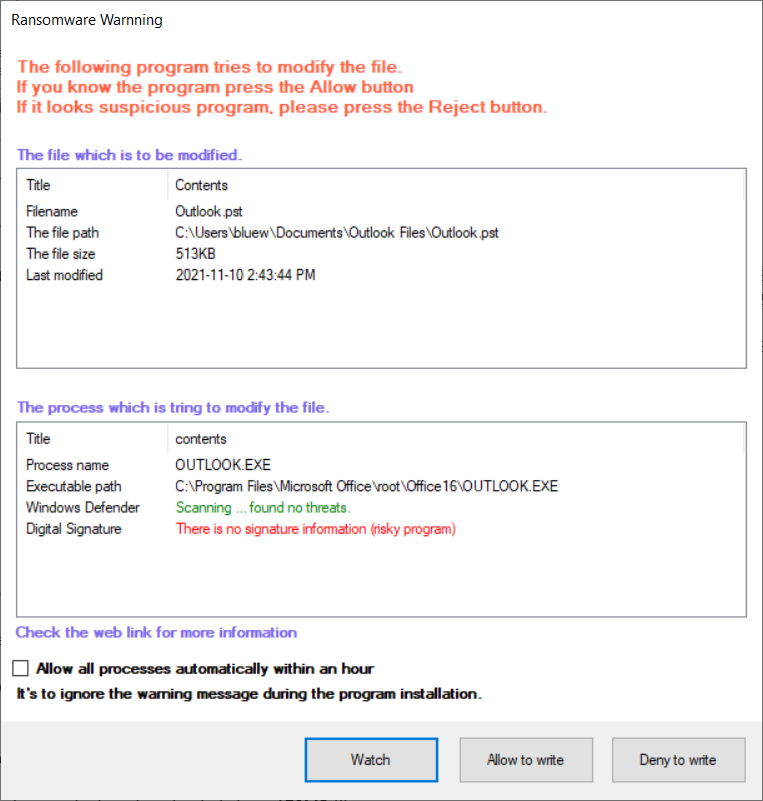
If the program is a program installed by the user or a known program, click the Allow button.
If the process is unknown or suspicious, you can click the Watch button or the Reject file modification button.
If you refuse to modify an important or necessary process, you can click the Reset button in the menu.
If you click the watch button, all files modified by the process are backed up and saved in a specific folder before modification.
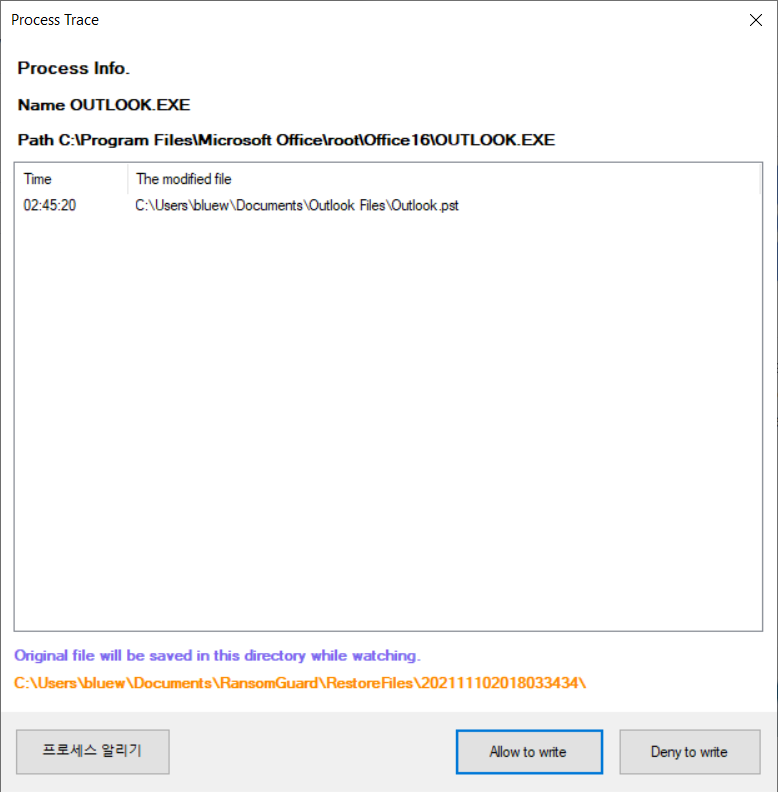
Click on the path in the gray area below to open the folder with the original file.
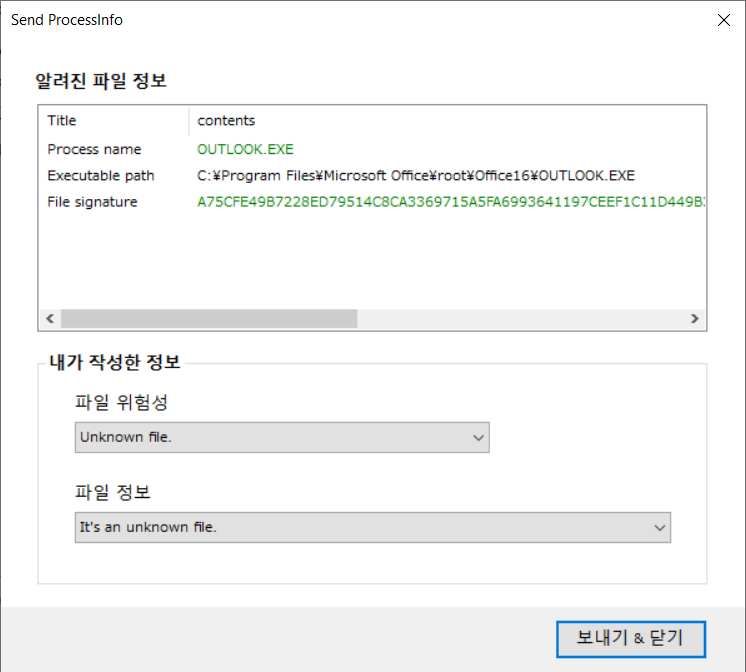
Comments on process information can be sent by clicking the Notify Process button. The results of analysis on the server are shared with multiple users.
3. Spyware Detection and Settings
It is a function to detect and prevent spyware.
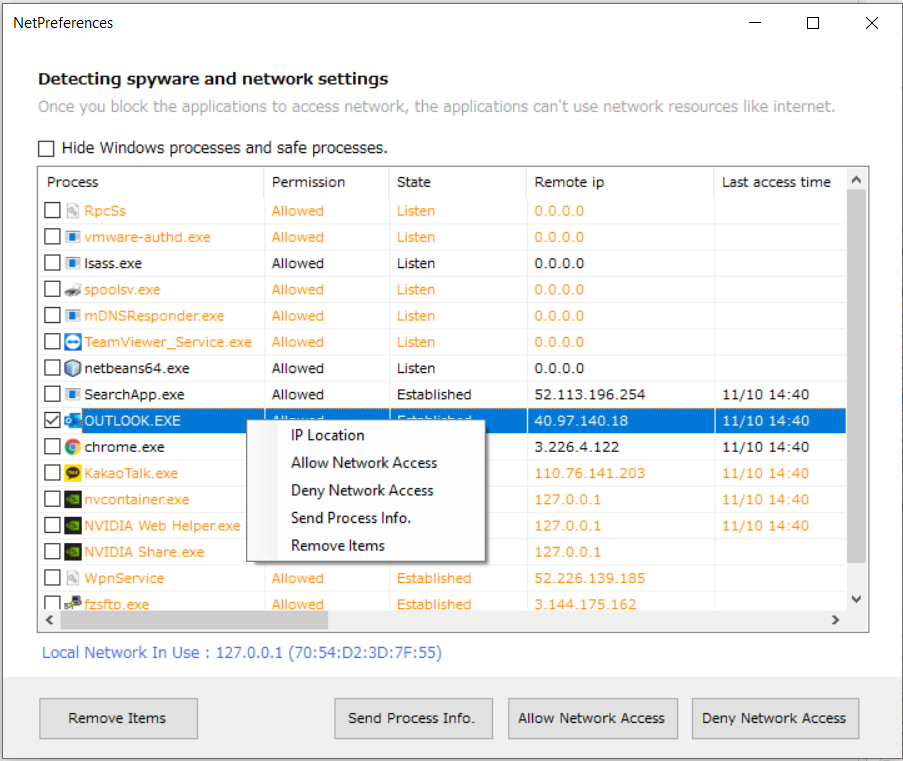
If you click the menu, you can see the processes using the network in real time.
Orange indicates processes that need attention and red indicates blocked or spyware.
If you uncheck Hide Processes, you can see all process information.
If you right-click on the process, the action menu appears. The operation method is as follows.
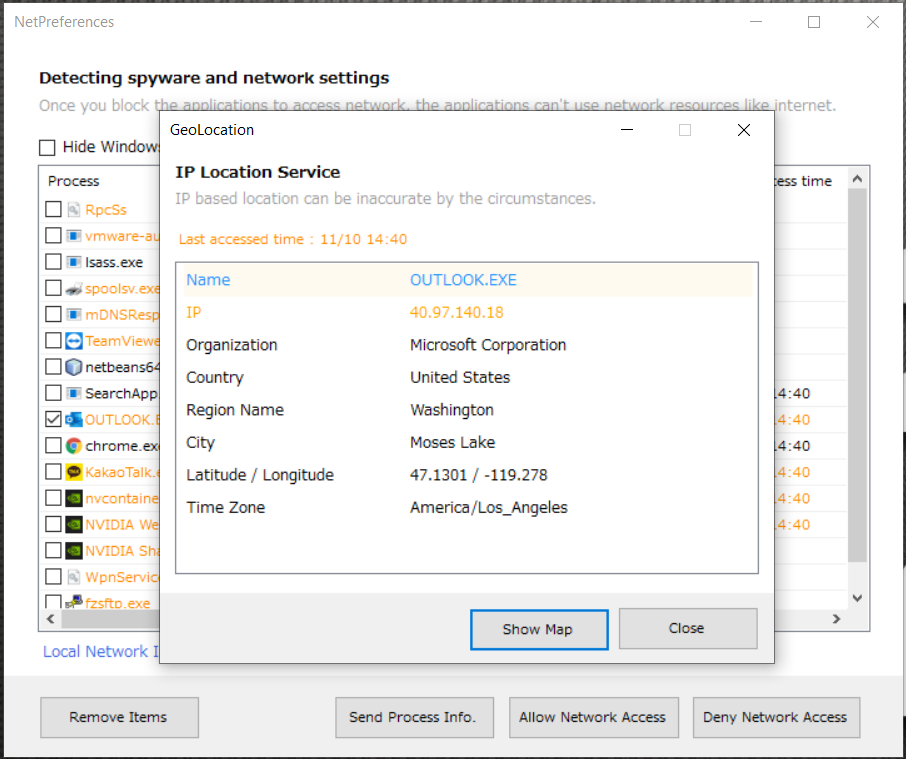
IP Connection Location: Shows the location information of the IP accessed by the process.
Enable/Disable Network : Prohibit or allow network use for the selected process.
Inform Process: You can inform information about the process.
Delete from lease: You can delete old or unnecessary processes from the list.
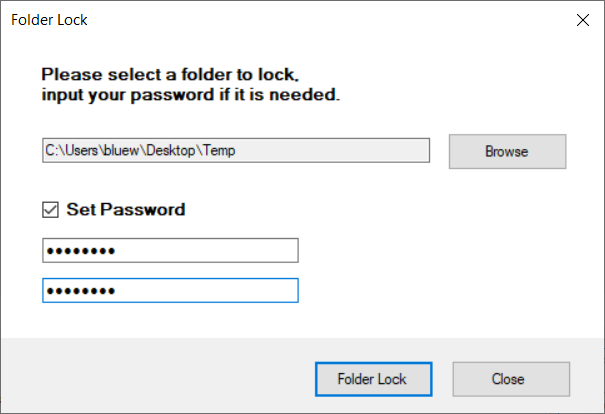
3. Set Folder Lock
This is a function to protect an important document folder when running a dangerous program.
When a folder lock is set, no process can access the folder.
Set the folder path as shown in the figure below and enter the password as needed.
Folder lock settings can be unlocked again in the menu.
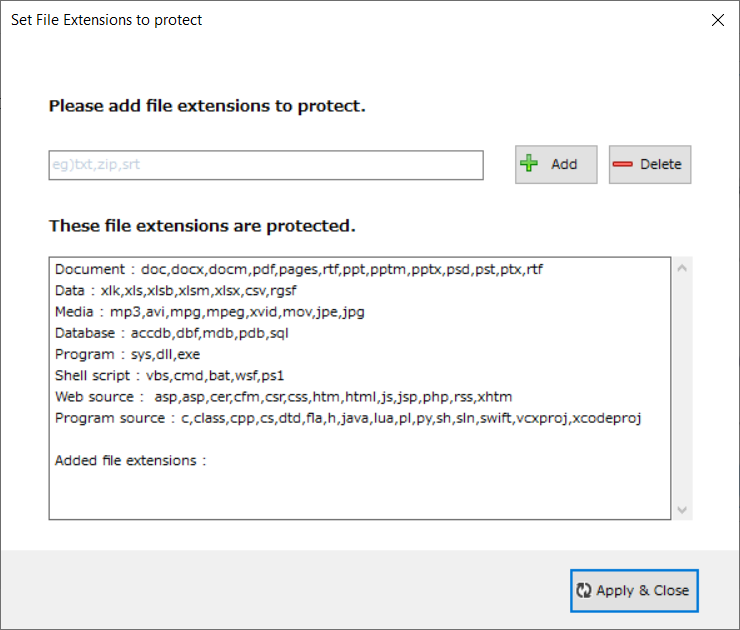
4. Add and delete extensions
In addition to the default extension, you can add extensions for documents used by users or files that require protection.
After entering the desired extension name (ex: txt,zip), click the Add button and click the Apply button.
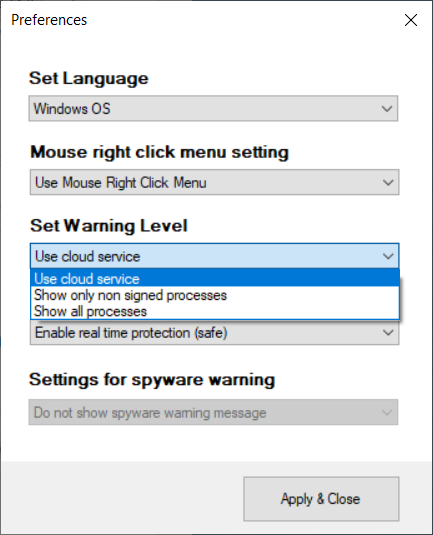
5. Alert Settings
Alert settings will use cloud information by default.
Since cloud information basically includes Windows basic files or process information shared between users, the number of
warning windows can be reduced to a minimum.
Users who want to use only the programs that are security-sensitive or necessary can control process access by selecting Show all warning windows.
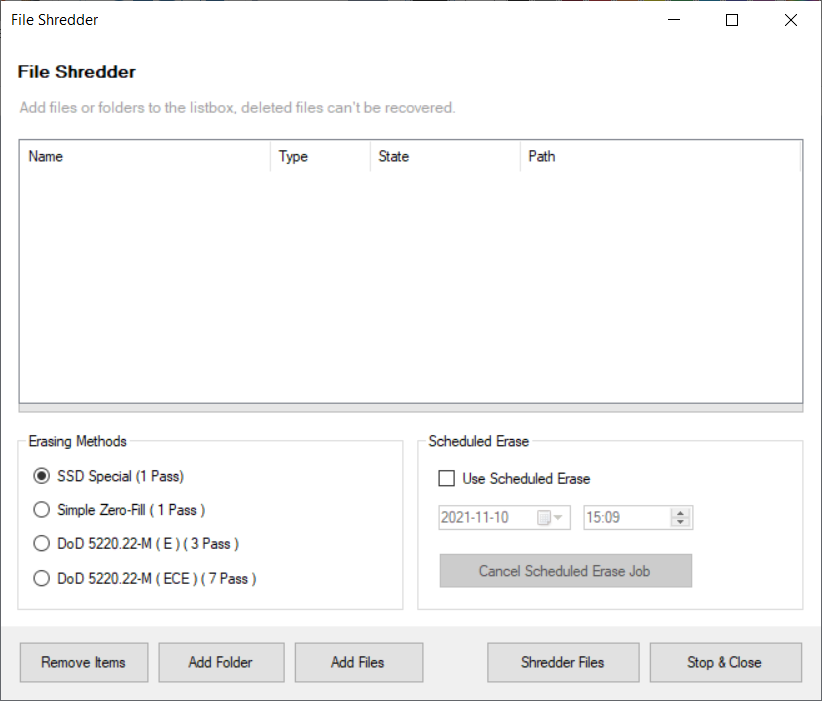
6. Deleting files completely
This is a function that completely deletes files so that they cannot be recovered.
After selecting the deletion method, you can add a folder or file by clicking the Add File button.
Click the Delete File button to start deleting the file.
In the case of scheduled deletion, the file is deleted in the background at a set time using the Windows scheduler.
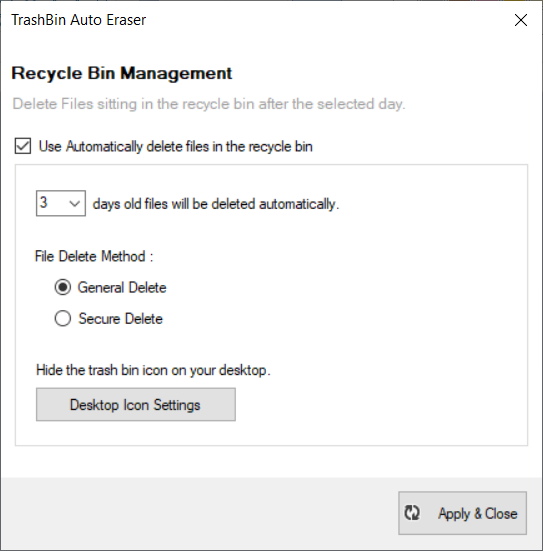
7. Manage Recycle Bin Deletion
This function automatically deletes files in the Recycle Bin.
If you use the automatic recycle bin deletion function,
files that have passed a specific date based on the recycle bin deletion date are automatically deleted.
File deletion is executed once a day based on 12:00 PM.
As for the deletion method, you can choose between normal deletion and full deletion.
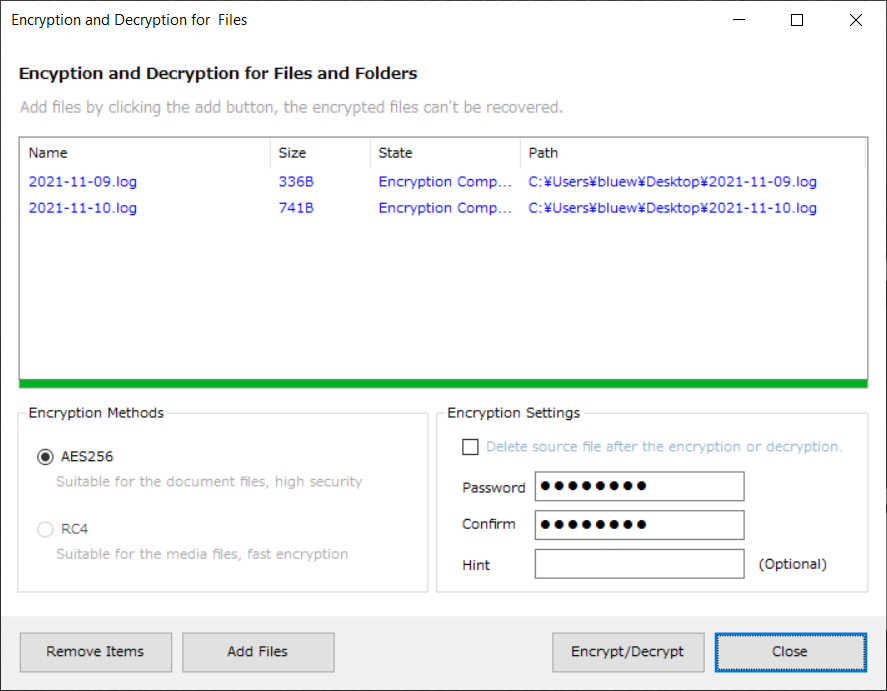
8. File Encryption
The ability to encrypt or decrypt files.
Click the Add File button to add the file you want to encrypt or decrypt to the list
, set the encryption method, password, and setting options, and click the Encrypt/Decrypt button.
The method of adding a file can be added by right-clicking the file after selecting it.
If the encryption/decryption menu is not visible when you
right-click the mouse, you must select Use the right-click menu in the settings menu .
Encrypted files have the extension rgct and are indicated by a lock icon.
To decrypt, double-click the file and press the decrypt button.

9. Safe Case
This function is useful when using portable storage devices such as USB or cloud storage devices.
It is a drive encryption function similar to BitLocker in Windows.
There is no need to encrypt or decrypt files one by one because encryption and decryption are performed in real time when reading and writing files in the virtual drive .
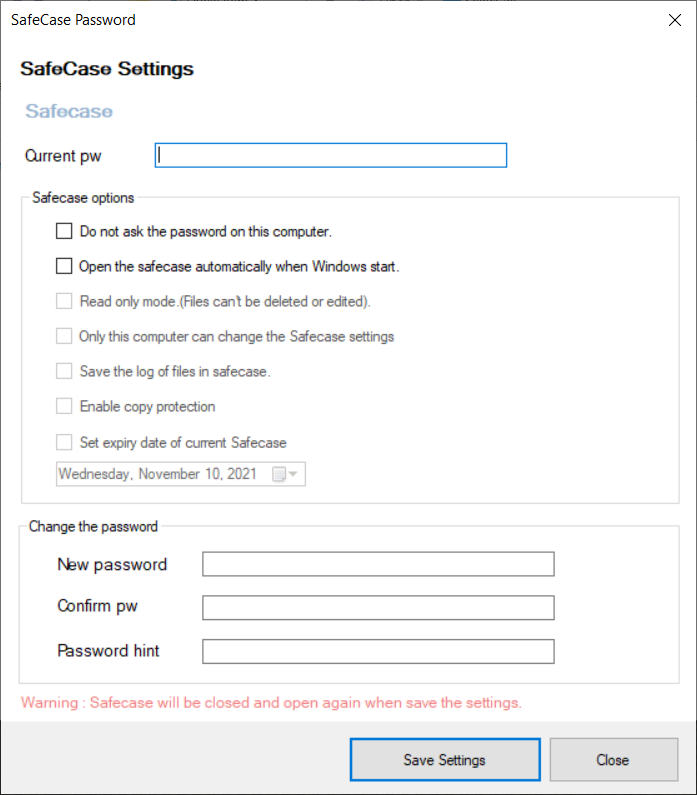
If the encryption method is set to AES256 and the password length is long, it will be difficult for the FBI to crack the encryption.
However, after the encryption method is selected, the password cannot be changed.
There is no way to view the contents of the file without the password, since the encryption key is generated using the user-entered password directly.
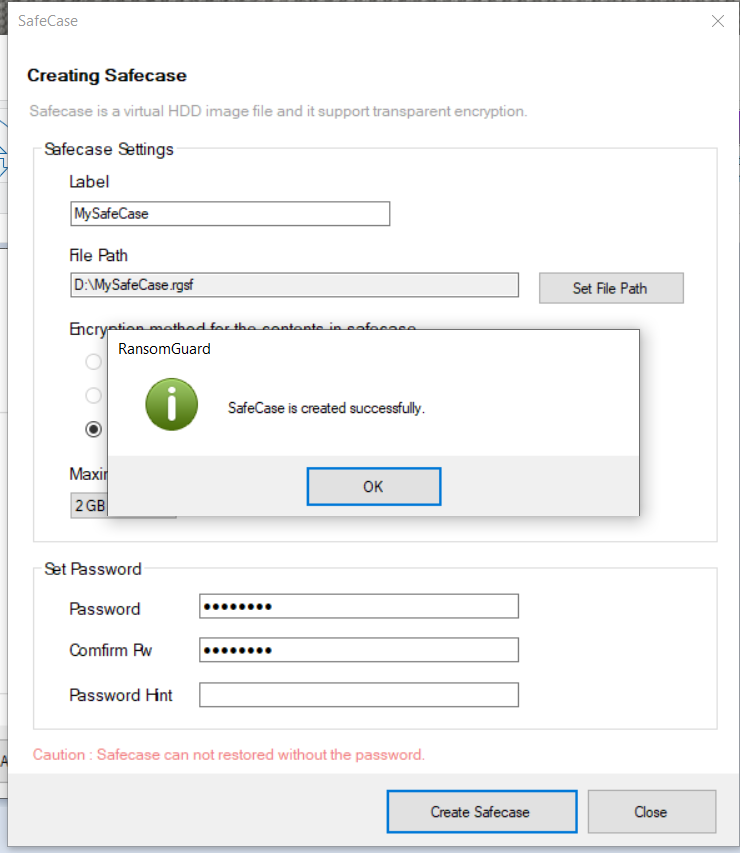
To use, click the Create Safe Case menu in the menu, and the creation screen appears.
Safe case name and path (Name and path name can only be in English.) Enter a password, etc., and set the maximum size.
The maximum size is the maximum size that can be used on the virtual disk and has nothing to do with the actual image file size.
Finally, click the Create Safecase button.
Sometimes a message asking to format appears, but you can ignore it because it formats the image itself.
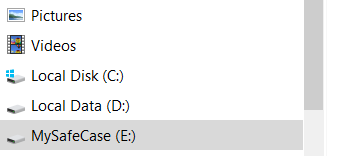
To open the safe case, click the Open button in the menu or double-click the icon.
To close, click the Close Safecase button in the menu.

10. How the program works
Unlike the existing antivirus, the ransom guard program manages the process white & black list at the same time. Therefore, when an unknown process is found, a warning window is displayed for the user to judge for himself.
When using the cloud service, information judged by multiple users is analyzed and stored on the server. Because of this, information about new popular ransomware or viruses can be shared between users in real time.